
If you have an iOS device, you’re probably familiar with its built-in Notes app. I use it often to jot down shopping lists, blog ideas, and more. You can create a new note directly in the Notes app, or you can ask Siri to start a note for you. In addition to being able to make tables, lists, and drawings — you can also scan documents directly within the app!
How to scan documents in Notes app:
- Open a note or create a new note
- Tap the camera logo, then tap Scan Documents
- Place your document in view of the camera on your device
- You can use the auto-capture option by bringing your document into the viewfinder or use the shutter button or one of the volume buttons to capture the scan
- You can add additional scans to the document or tap Save whenever you’re done
Once you scan the document, you can drag the corners to adjust the scan to fit the page. You can also choose your filter (Color, Black/White, Grayscale, Photo). After making those adjustments, you can select Markup and edit the document. Below is an example of my scan:
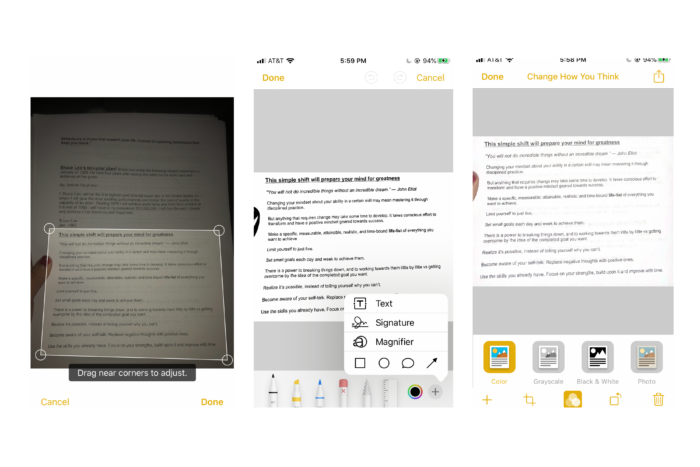
The Markup feature allows you to add your signature, select tool to use, add text, magnify text, and more.
Click here to learn more!
