
Since the birth of the iPhone over eight years ago, Apple has worked hard to make their devices as user-friendly as possible. In order to reach the widest range of consumers, Apple’s products feature simple controls and interfaces on their iOS devices, as well as several accessibility features not commonly found on other smart devices.
In previous blogs, I have discussed many accessibility features available on iOS devices. Here are a few of these blogs, specifically covering iOS 8, its most recent software update:
- 10 New Accessibility Features in iOS 8
- Top 4 Keyboards for Accessibility on iOS 8
- Top 7 features for the visually impaired in iOS 8
In this blog I will cover built-in accessibility features and tricks so that individuals with hearing, vision, and physical impairments can fully enjoy their iOS devices. (Many of you may already be familiar with several of these tricks, especially if you’re a regular visitor to our blog, but hopefully you’ll learn something new, too!)
Siri
Siri is a well-known iOS feature, but the intelligent
personal assistant doesn’t receive enough credit for its potential as an aid for those with vision and physical impairments.
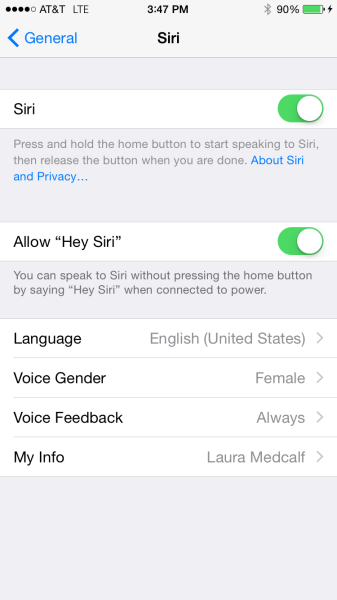 To activate Siri, press and hold the Home button on an iOS device for a few seconds. Siri is ready to assist once you hear a double-chime.
- When your iOS device is plugged in to a power source, you can state “Hey Siri” to grab Siri’s attention. (This has been a great feature for me, especially when I am lying down and cannot reach my phone.)
- To enable: go to Settings > General > Siri and select Allow ‘Hey Siri’
VoiceOver
VoiceOver is the key feature that makes iOS devices more accessible for individuals with visual impairments. When enabled, it switches the “default navigation that previously relied on precise finger presses in favor of one where broad strokes and gestures can complete just about any task.”
- To activate VoiceOver, press and hold the Home button to activate Siri and say “Turn on VoiceOver.”
- You may also activate VoiceOver by scrolling through the Settings menu to Accessibility, then click VoiceOver and toggle the switch in the on position.
- Once VoiceOver is enabled, swipe left or right anywhere on the screen to move the selector, which will cue VoiceOver to read the selection aloud. Once you find an area you’d like to select, simply double tap on the screen.
- By enabling VoiceOver, sound effects will also be activated that provide the user audible feedback on their gestures. The sound effects can be disabled from same menu.
- VoiceOver also has the capability to read notifications for emails, text messages, and more, as they arrive on your iOS device.
Zoom
Did you know your iOS device offers a built-in magnifying glass? It features the same benefits of the physical magnifying glass, with even more functionality.
- To activate Zoom, go to Settings > Accessibility >
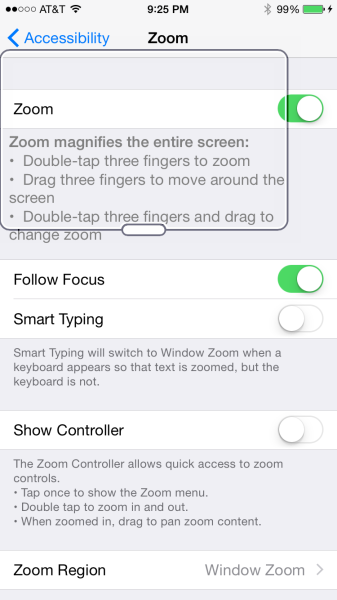 Zoom then toggle the switch to the on position.
 - To zoom in on a body of text or a photo, simply double-tap the screen with three fingers.
- From there, you can drag the window around the screen as you please by pressing and holding a finger on the Zoom anchor on the bottom of the magnified window.
- Users can adjust the size of the magnifying window and the lighting filter which you can view text and pictures through (Grayscale, Low light, Grayscale Inverted, Inverted.)
Increasing screen readability
Besides the Zoom option, iPads and iPhones offer even more features to make words more legible and pictures easier to view on the screen.
- In the Accessibility menu, select Larger Text to enable the feature, then customize your preferred font size to improve readability while using an iOS device.
- If you need to increase readability even more, flip the toggle next to Bold Text.
- For individuals who are sensitive to certain colors, there are options to increase the color contrast, invert or set the screen’s color palette to grayscale.
Options for users with hearing impairments
In addition to the many accessibility features available for the visually impaired, there are also several options available for individuals with hearing impairments.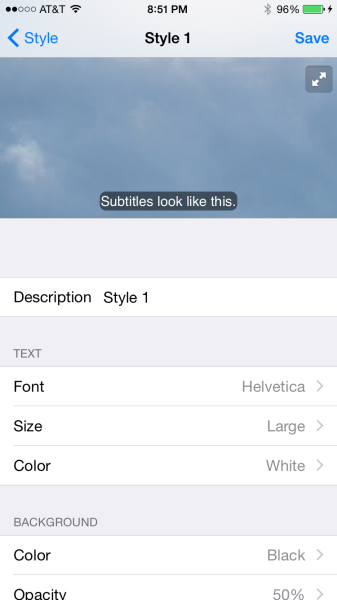
- In the Accessibility menu, users can pair a Bluetooth-enabled hearing aid to their iOS device through the Hearing Aids option. Once the hearing aid is paired to the device, all audio (e.g. music, movies, podcasts, etc.) will stream to the hearing aid.
- For users who cannot hear the phone when it rings, the LED light on the back of iPhones (Generations 4 and up) can be activated to flash whenever you receive a call or text message. To activate this feature, toggle the switch next to LED Flash for Alerts.
- iOS devices also offer support for subtitles and closed captioning. To activate and customize how the overlaying text will look, select Subtitles and Captioning inside the Accessibility menu.
- You may also adjust the audio balance from left to right in order to receive full audio delivery in the ear that serves you the best. (The audio balance slider is also located in the Accessibility menu.)
Options for users with physical impairments
As previously discussed, iOS devices can be accessed with many gestures like swiping and pinching the screen. Further, Apple has made these unique functions easily accessible for people with physical disabilities.
- AssistiveTouch allows users to use their iPhones or iPads even if they have difficulty touching the screen, or if they require an adaptive accessory.
- To activate AssistiveTouch, scroll to the bottom of the Accessibility menu and click AssistiveTouch and toggle the switch into the on position.
- Once it is enabled, an on-screen button shaped like a square will appear. By tapping this button, you’ll find a full menu where you can easily access features such as volume, screen shot, and more.
- Under the same menu, you can also create custom gestures to unlock your device, type a quick text message, and more!
To learn more about Apple’s accessibility features, click here.
